Edurun Installation Guide for Canvas
This guide details the technical process to install and integrate the Edurun (Edurunapp) tool in a Canvas LMS instance.
Prerequisites
Before starting the configuration, verify compliance with the following requirements:
-
Deployment Status:
-
The tool must be deployed with active SSL certification (
https://). -
There must be network connectivity between the Canvas instance and the application.
-
-
Source Code Access:
- Ability to modify server configuration (platform registration file) or direct contact with the development team.
-
Canvas Permissions:
- Account Administrator role or granular permissions to manage “Developer Keys”.
Part 1: Developer Key Creation
1. Access Configuration
-
Log in with an Administrator account.
-
Navigate to the Admin menu > Select the account.
-
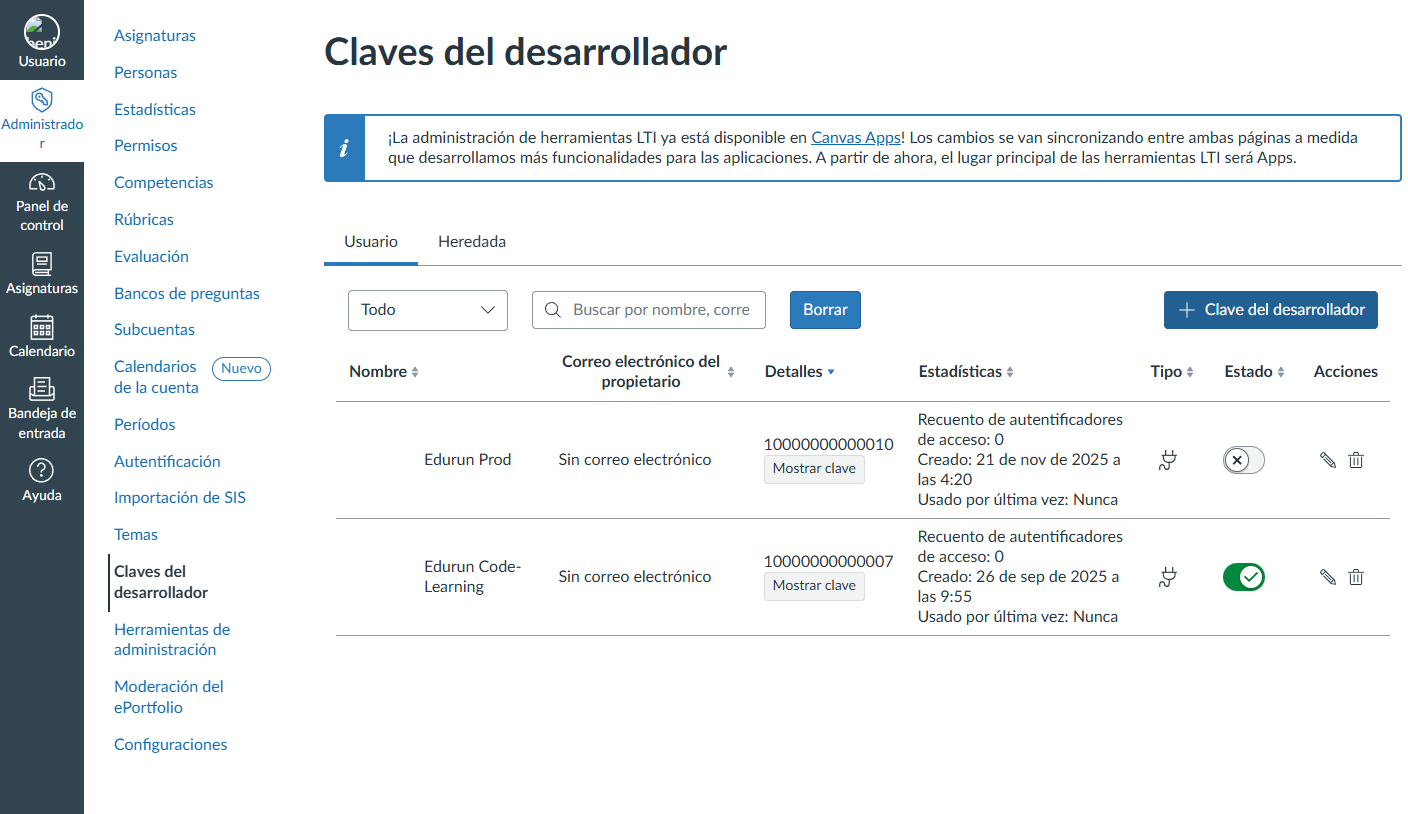
In the sidebar, select Developer Keys.
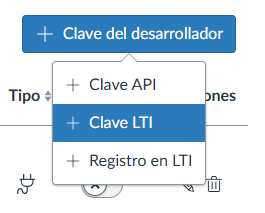
2. Key Generation
-
Click the + Developer Key button.
-
Select the + LTI Key option.
3. Parameter Configuration
Ensure the form is in Manual Entry mode.

| Field | Required Value |
|---|---|
| Key Name | Edurun Code-Learning |
| Redirect URI | https://edurunapp.cl/tool |
| Title | Edurun Code-Learning |
| Description | Edurun Platform |
| URI meta link | https://edurunapp.cl/tool |
| OIDC Initiation URL | https://edurunapp.cl/tool/login |
| JWK Method | Public JWK URL |
| Public JWK URL | https://edurunapp.cl/tool/keys |

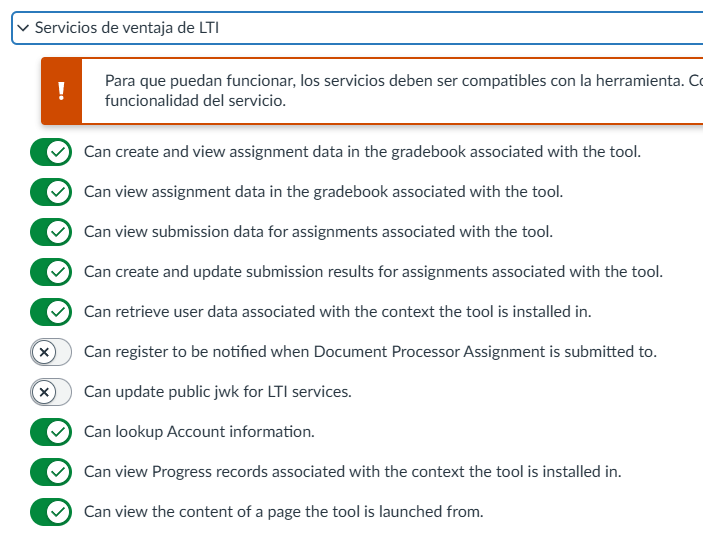
4. LTI Advantage Services Configuration
In the “LTI Advantage Services” section, expand the menu and activate all switches. This enables critical functionalities such as:
-
Gradebook synchronization.
-
Receipt of submissions and grade updates.
-
User context information retrieval.
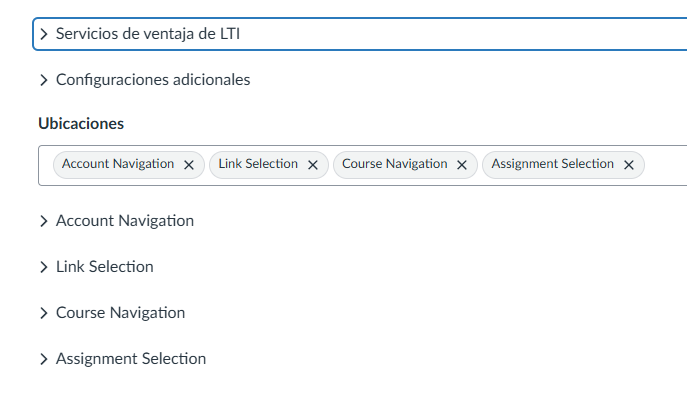
5. Placements Configuration
In the “Additional Settings” > “Placements” section, search and select only the following options:
-
Course Navigation -
Assignment Selection
6. Finalization
-
Click Save.
-
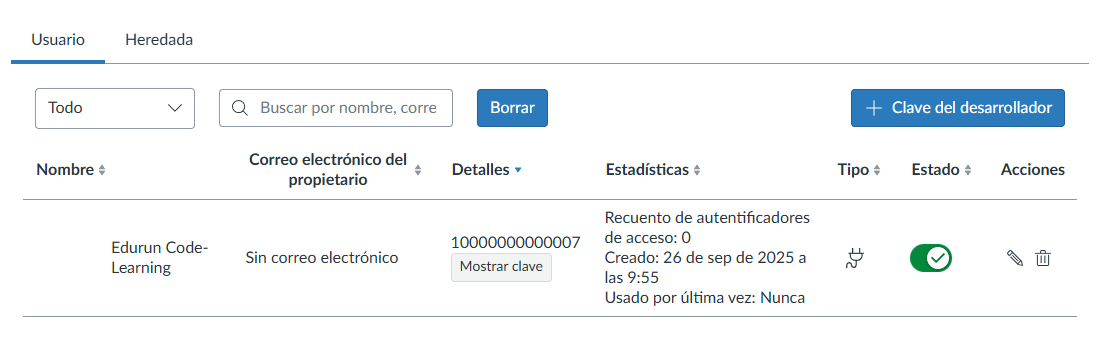
In the main keys list, locate the newly created key.
-
Change the State from
OFFtoON. -
Copy the numeric number visible in the Details column (above the “Show Key” button). This is your Client ID.
Part 2: Platform Registration in the Tool
Next, you must contact a member of the development team and provide your Client ID (obtained previously) to activate the tool within your Canvas.
In Canvas, the Client ID has a format similar to this:
1000000003Note: This process can take from 15 minutes to 24 hours, depending on the availability of our staff.
Part 3: Course Installation
Once the global key and backend are configured, instructors or administrators can add the tool to courses.
-
Enter the desired course in Canvas.
-
Go to Settings in the course menu.
-
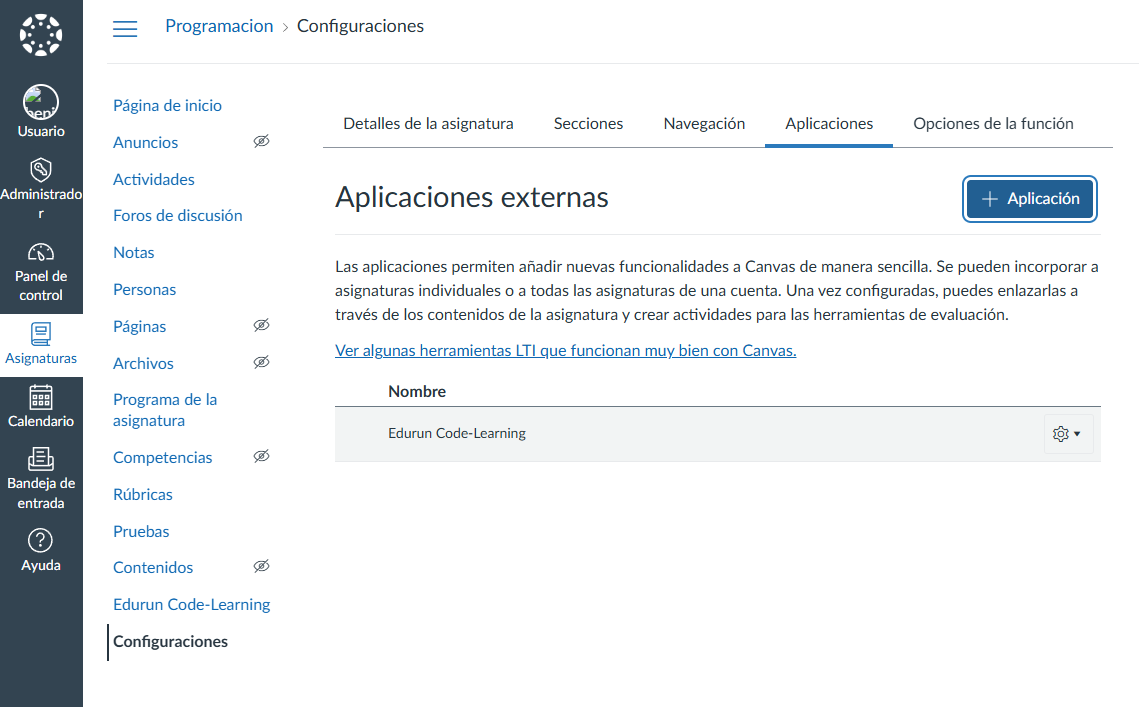
Select the Apps tab.
-
Click the + App button.
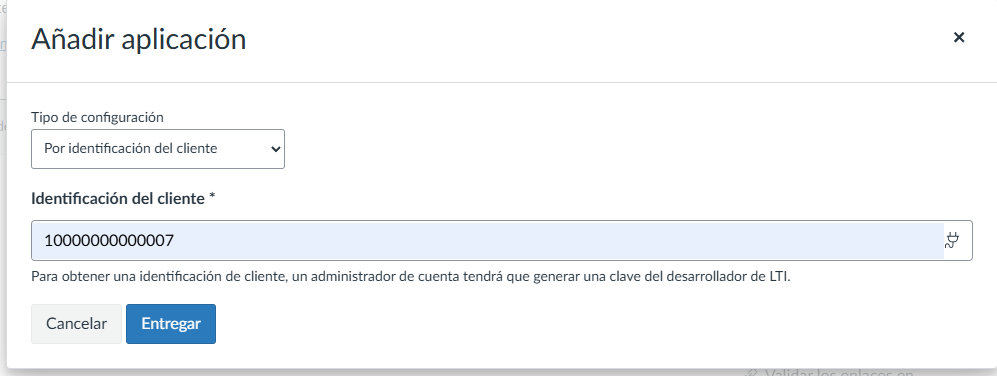
-
In the “Configuration Type” menu, select By Client ID.
-
Paste the Client ID (e.g.,
10000000000007) obtained in Part 1. -
Click Submit and install the tool.
The “Edurun Code-Learning” tool will now appear in the course navigation menu.